- Dust sheets or similar material to protect carpets furniture etc.
- Disposable plastic gloves (optional).
- A bucket or bowl of clean water plus rags for cleaning.
- A tin of paint (usually water-based) thinned with 1 part water to 8 parts paint.
- A tray or bowl.
- Some cardboard or other disposable material for testing the effect.
- More rags (preferably lint-free cotton) to create the effect.
Like all paint-effects, ragging-on can be a little messy, so wear old clothing or overalls.
Also: remove or cover all carpets, furniture and other valuables from the room.
Prepare
the surface that is to be painted, apply at least 2 coats of mid-sheen paint in your chosen
colour
and allow to dry thoroughly.
Water-based paint dries quickly so start on your smallest walls first; your speed will improve with experience.
Have a bucket or bowl of clean water and some rags close at hand for cleaning purposes.
Pour a little of the thinned paint into your tray or bowl (Approximately a pint (½ Litre).
NOW FOR THE MESSY PART!
Take a piece of lint-free cotton cloth approximately 18 inches (450 mm) square and saturate it in the paint.
Make sure that it is completely covered with paint. Your hands will be too! but that just adds to the fun.
Wring the cloth out as much as you possibly can.
Wipe the excess paint from your fingers with it and if necessary, wring it out again.
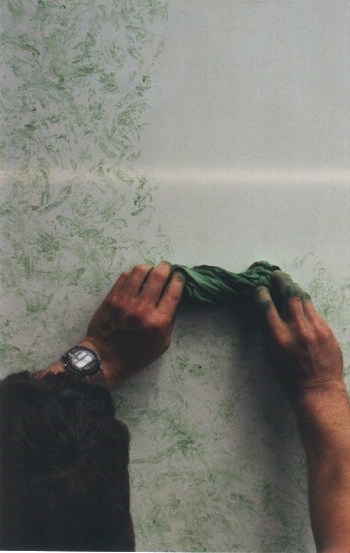
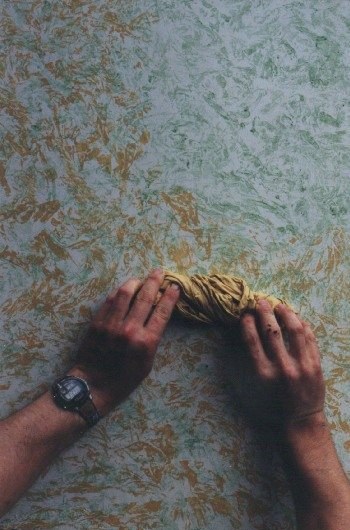
Roll the cloth into a loose cylinder shape and twist it slightly.
Roll it across the surface of your cardboard to practise the effect.
The challenge of ragging-on is to move the rag evenly over the surface.
Use the tips of your fingers to roll the cloth rather than the palms of your hands.
When you feel confident, try it on the walls.
You should roll small sections at a time, about 18 inches (450mm), then take the cloth away from the wall, and start again in a different direction.
This is to prevent repartition, although some people prefer this method.
After you have rolled a two or three sections, open out the rag, dip it in the paint and repeat as before.
If you can, get someone to carefully clean paint from woodwork etc while you work, otherwise, re-paint woodwork etc when it is dry.
Allow the paint to dry before protecting with a coat of clear glaze or varnish (optional).
Basic Ragging-on.
Multi-coloured.
!!! With oil-based
method, used rags must be laid flat and allowed to dry before discarding to prevent spontaneous combustion!!!
The more contrast between the basecoat and topcoat; the more pronounced the pattern will be. (Especially important with this effect)
You should not add white to the basecoat colour to make the topcoat, or vice versa. This gives poor results unless the contrast is strong.
Ragging-on gives a better effect if 2 different colours are rag-rolled over the basecoat. (1 at a time of course)
A matt or semi-sheen basecoat works best as silk tends to make the rag slip & slide.
Colours should be related in some way, either different tones of the same colour, or similar tones of related colours.
It is advisable to dab a corner of the cloth into internal corners first, then rag-roll up to it. Otherwise the corners will seem bare.
![]()
![]()