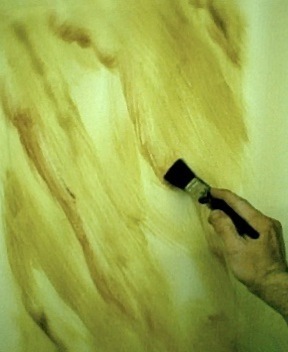
a) Apply colours in drifts.
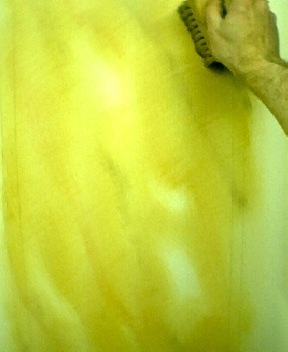
b) Blend with a stippling brush.
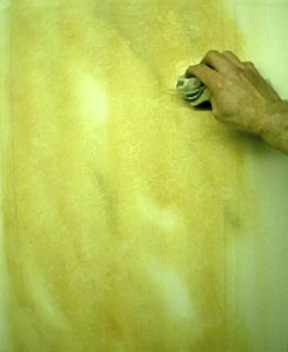
c) Rag-roll the background.
Sienna Marbling.
|
Marbling incorporates several techniques used for creating
basic paint-effects, such as rag-rolling, stippling etc. However, it also contains more advanced techniques, and for this reason, this tutorial is not linked to the corresponding example page. Sienna marbling is very time consuming and practise is essential. We strongly recommend that you try it out on a few sample boards first. You will then be able to see what you can achieve & get a little practise. You must first choose between marbling with oil-based paints or water-based paints. Water-based paints dry much faster than oils, so you can move on to the next stage quickly. However, many of the more subtle effects can only be achieved using oils. Also: For your first attempts, it may be advisable to use oils, thereby allowing yourself more time to create the effect. |
|
Oil based technique for emulating Sienna Marble. |
| YOU WILL NEED: | Sample boards. |
|
Dust sheets or similar material to protect carpets furniture etc. Fine Sandpaper. Dusting brush. White mid-sheen (eggshell or satin finish) paint. Tubes of oil colour: Yellow Ochre, Raw Sienna, Burnt Sienna, Burnt Umber, and Black. Turpentine or white spirits. Raw linseed oil. Liquid driers. Brushes: 1" (25mm) paintbrushes & size 0 & 2 sable pencil brushes. Stippling brush. Badger softener and/or Hog-hair softener. Lint-free cotton cloth Mixing tray (baking tray or similar). Clear varnish. |
| Step 1: | Prepare your sample boards: |
|
Hardboard (available from timber merchants & DIY stores) is perfect for use as sample boards. Cut the hardboard (they may do this for you) into sections 2' (600mm) high by 1' (300mm) wide. Sand down the face & edges of the board with fine sandpaper, then dust off with your dust brush. Paint the sample boards with 2 coats of White oil-based mid-sheen paint & allow to dry thoroughly. |
|
| Step 2: | Mix your medium in the following quantities: |
|
Mix 2 teaspoons full of raw linseed oil with 4 teaspoons full of Turpentine. Then add a drop (literally - 'a drop') of liquid driers, or 2 drops if the atmosphere is very cold & damp. This is your "medium" or "glaze", which will be mixed with each of the oil colours. |
|
| Step 3: | Mix each of the colours with the medium before you begin. |
|
Baking trays are ideal for mixing the colours with the medium. The main colour for the background will be Yellow Ochre, which should be mixed with 1 teaspoon of the medium. The amount of oil colour required varies depending on the manufacturer; as a rough guide: squeeze ¾" (18mm) from the tube. Mix 1 teaspoon of medium with Raw Sienna, and ½ teaspoon of medium with each of the other colours, in the same ratio. Some of the White oil-based mid-sheen paint, used to basecoat the panel, should be added to the Black to make Mid-Grey. |
|
| Step 4: | Applying the effect. |
|
Dip a clean lint-free rag into the clear medium and smear it over the sample board thinly (this will prolong the working time). |
|
|
a) |
With a 1" (25mm) paintbrush, spread Yellow Ochre thinly over the panel, leaving one or two patches untouched. |
|
With the same brush, add the other colours in drifts approximately 1" (25mm) wide, as in picture a). Start with the Raw Sienna, which can be used quite liberally, then continue, more sparingly, with the darker colours. If the Burnt Sienna seems too strong, add Mid-Grey to tone it down. |
|
|
b) |
Gently blend the colours together lightly with a stippling brush, drifting into (but not obliterating) any bare patches. |
|
The colours may be difficult to blend if there is insufficient medium in the mix, in which case, stipple more vigorously. The colours should be blurred and faded, but still visible as in picture b). |
|
|
c) |
With a dry lint-free, cotton cloth, rag-roll over the panel as in picture c). |
|
a) Apply colours in drifts. |
b) Blend with a stippling brush. |
c) Rag-roll the background. |
|
d) |
Soften the rag-rolling in all directions, with a badger softener as in picture d). |
|
If there is insufficient medium in the mix, the rag-rolling may be difficult to soften. In this instance, use a hog-hair softener, gently trying not to leave brush-marks. |
|
|
e) |
Mix some Raw Sienna with Burnt Sienna and add veins with a size 2 sable pencil brush, ignoring the pattern beneath. |
|
Vary the pressure on the brush to vary the strength of the veins, and avoid the white areas for now. Make crooked oval shapes of various sizes to form a chain-link pattern Continue to add veins using other colours as in picture e). |
|
|
f) |
Add a few white stones or pebbles of various shapes and sizes using one of the following methods: |
|
Apply dabs of white mid-sheen paint, mixed with medium, or just clear medium, and soften gently with a badger softener. Or remove some colour using a piece of lint-free cotton cloth pulled tightly over the wrong end of a brush as in picture f). Other tools can be used for this purpose, such as a graining horn or veining horn, or rubber 'shapers'. |
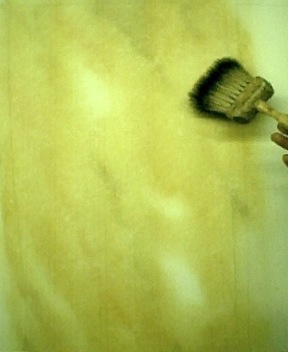 d) Soften in all directions. |
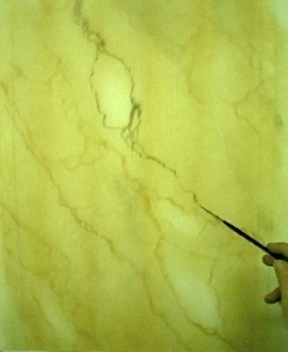 e) Add veins. |
 f) Wipe out stones. |
|
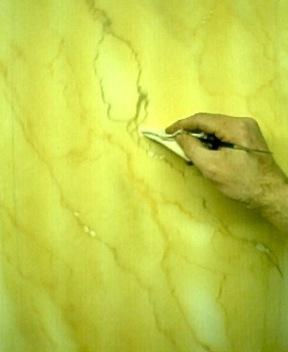
g) |
Add finer veins using a size 0 sable pencil brush surrounding the white stones or pebbles. |
|
Fine veins should also break off from the main veins and fade into nothing as in picture g). This fading-out effect should also be used inside the white patches. Double-load the sable pencil brush with two colours and twist the brush while adding the veins with it. [ Double-loading: Swipe one side of the brush through one colour, twist 1800, then do the same with another colour. ] Soften gently across the veins with a badger softener. |
|
|
h) |
Remove any excess colour from the outside by covering the work with sandpaper, and wiping off with a cloth. |
|
This is only required where the sienna marbling is to be framed by another effect. |
|
|
i) |
Allow the panel to dry thoroughly before protecting with at least 2 coats of varnish or lacquer as in picture i). |
 g) Add finer veins. |
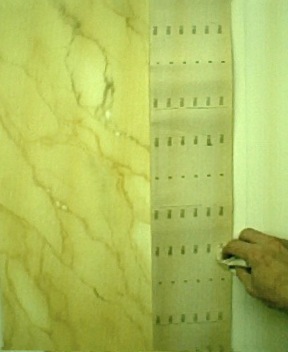 h) Remove excess from edges. |
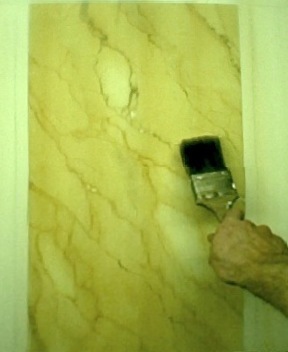 i) Protect with varnish or lacquer. |